Face Recognition
Verify your customer with our face recognition services.
Face Recognition services will allow you to enroll, verify, compare and test the liveness of human face from a photo to help your business KYC process. After successfully sign in to Verihubs Dashboard, click the left side menu 'Biometric' then click the submenu 'Face Recognition'. There are 3 features that can be accessed for face recognition, which are Demo, Summary, and Transaction Logs.
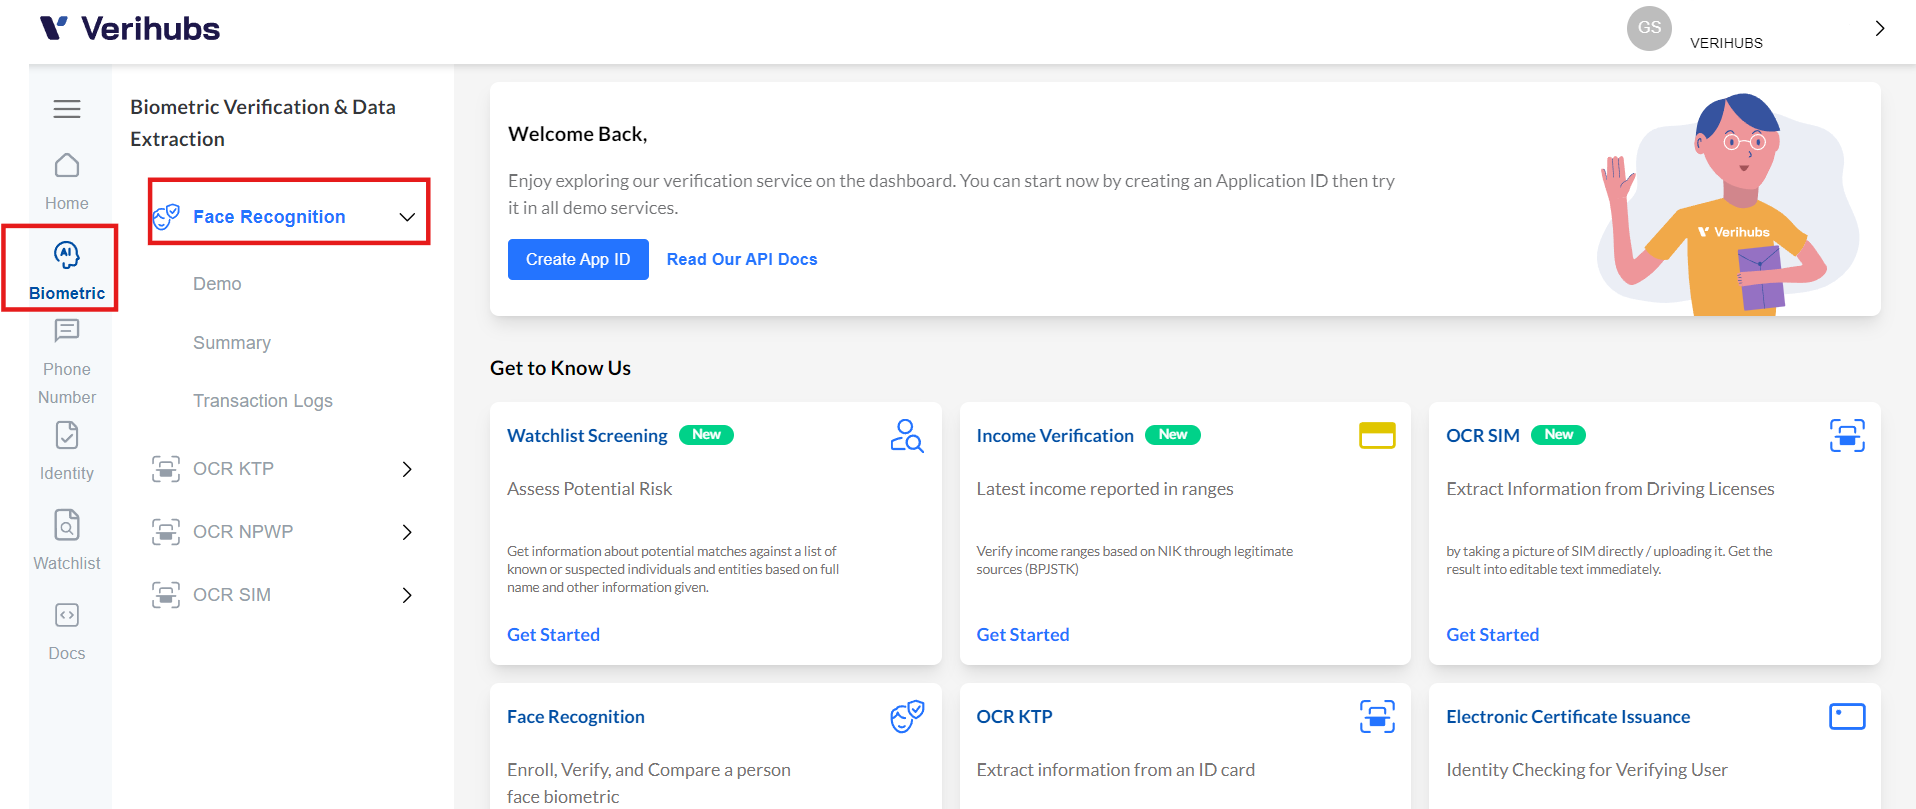
Access for Face Recognition Dashboard
🎈DEMO
After clicking 'Face Recognition', click on DEMO on the sidebar menu. You can easily try our face services just a click away.
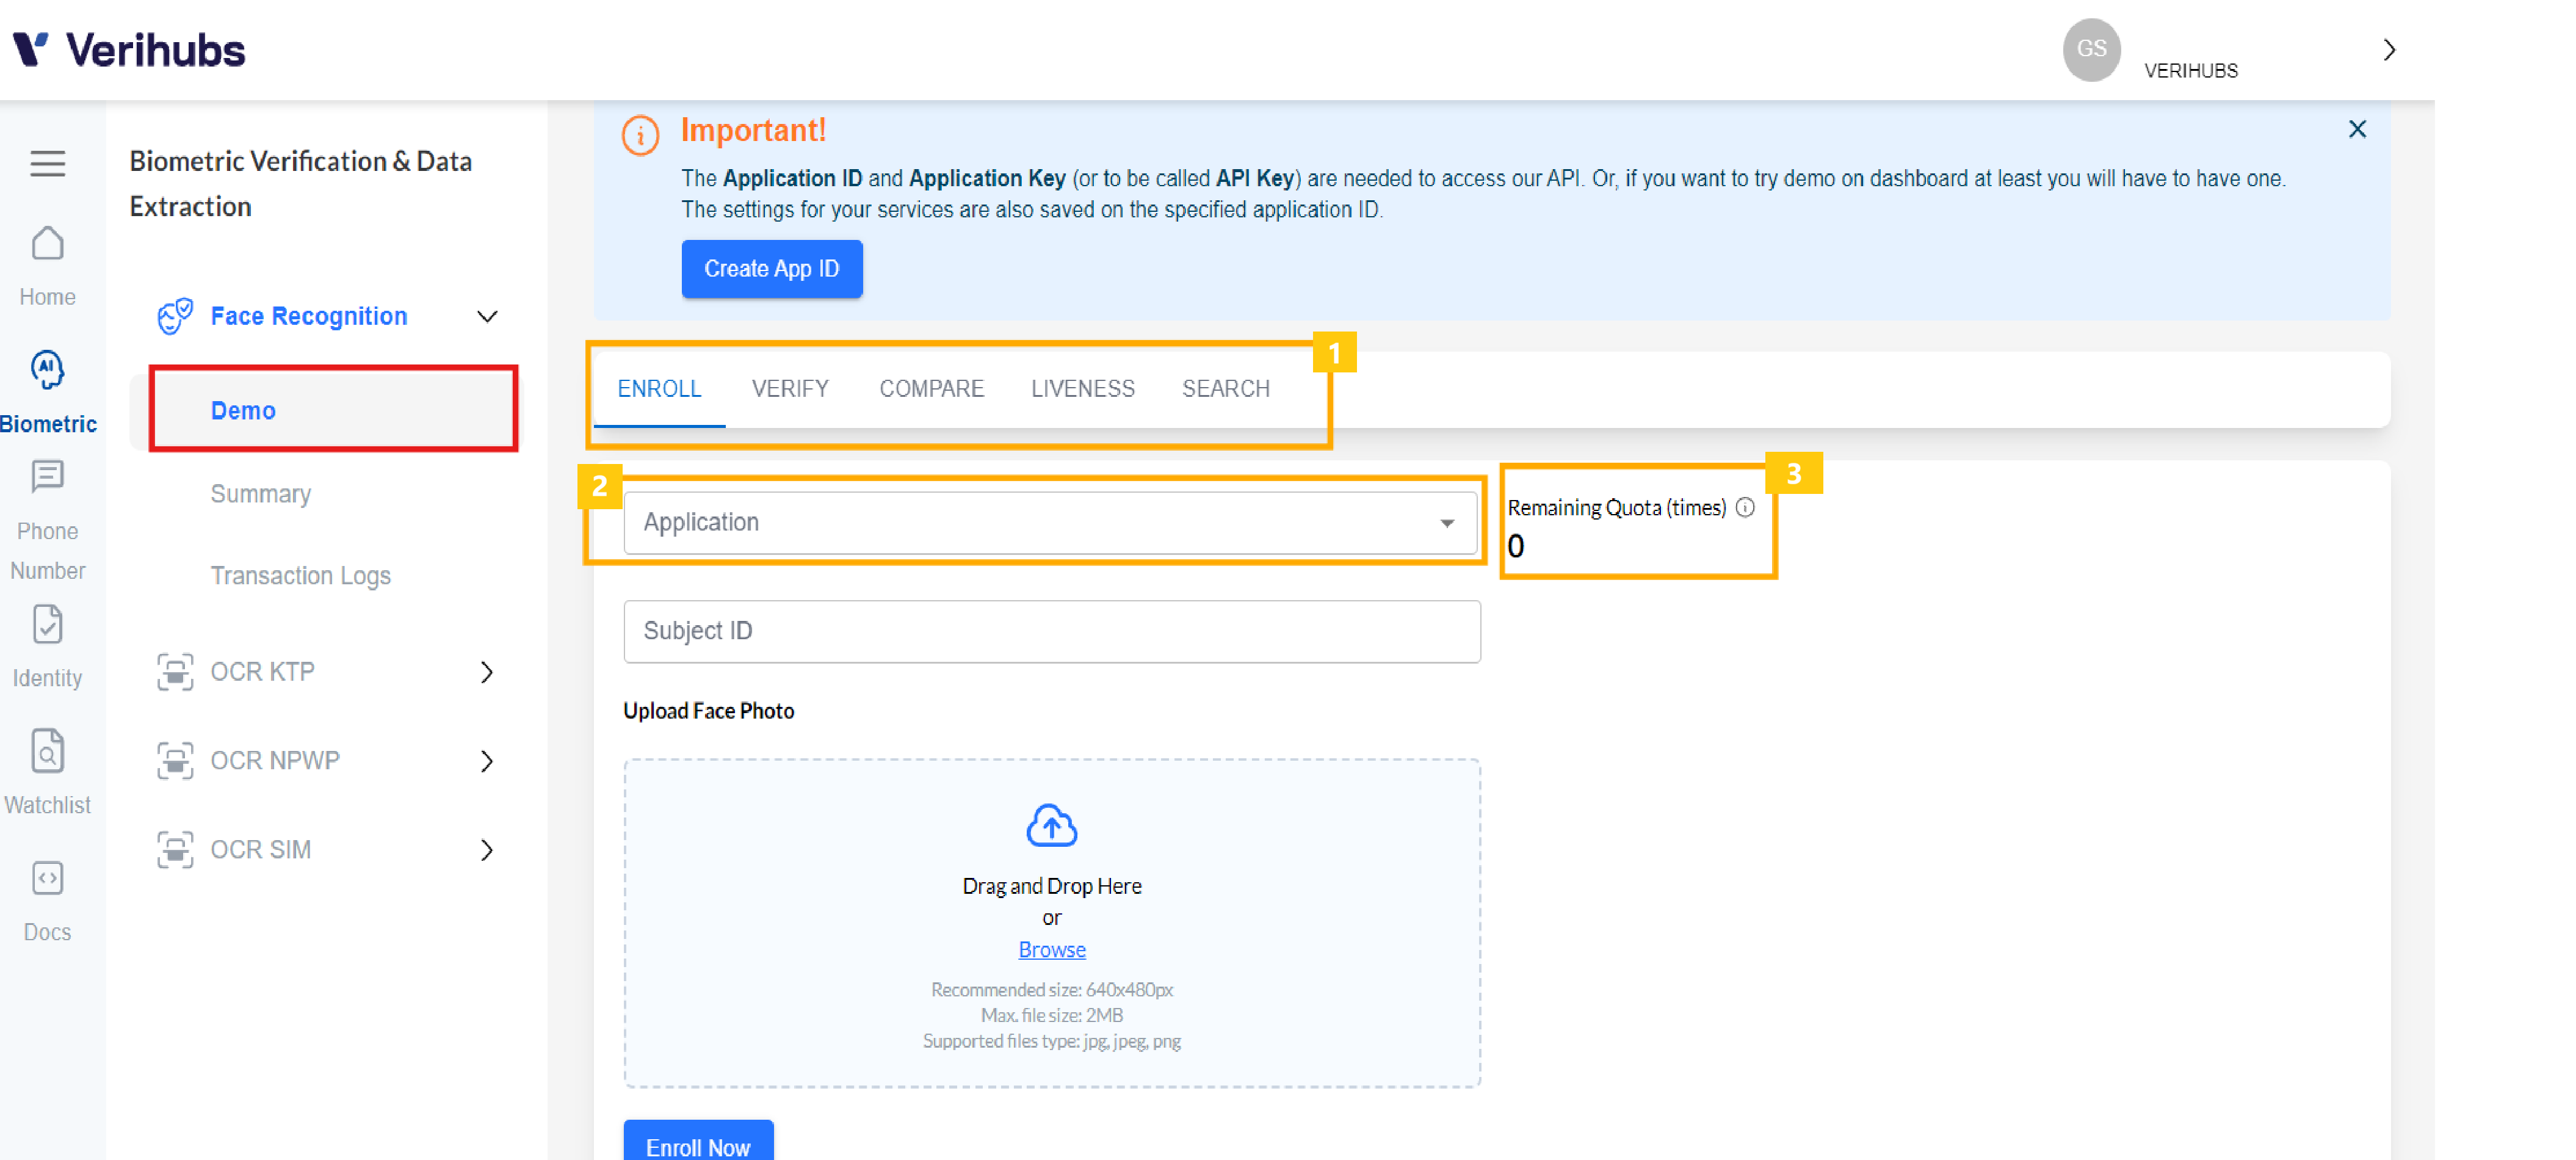
Face Recognition Demo
To try DEMO you can follow these steps
- Select which service you want to try in by clicking the tab on the right side that show the service name (enroll, verify, compare, liveness, and search)
- Select which Application Name you want to try the DEMO this on.
- You will be given a quota for each Application Name and Service Name to try the DEMO. Your quota shows here.
- Feel free to reach our customer representative when you are out of quota or needing more information about the service.
The DEMO for each service will be explained below
Enroll
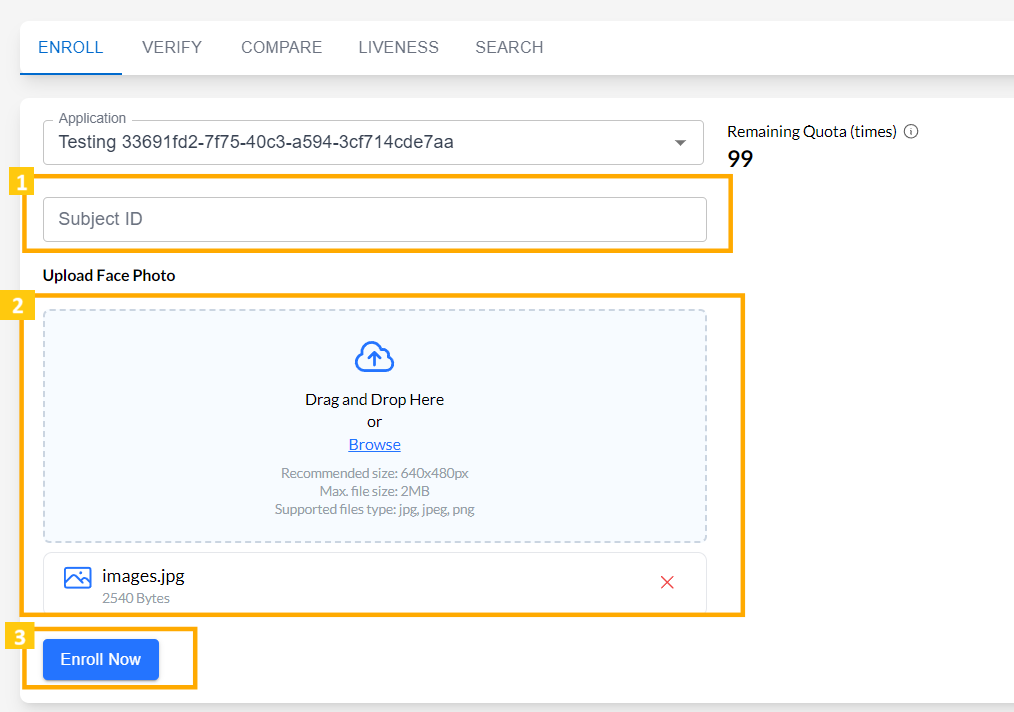
Demo Enroll
Enroll is used to store the image you upload to the server. It can be used along with verify to see if the person on the enrolled image is the same as the person in the verify image. After choosing the application ID and make sure the quota is > 0, you can follow below instructions:
- You can fill the Subject ID with anything. Subject ID will identify the image in your database and can be the reference later for verify / search services.
- Choose the image you want to enroll. You can drag the photo to the box, or browse from your documents.
- Click on "Enroll Now" and the image will be recorded in the database along with the result. The results will be shown below the "Enroll Now" button as per following.
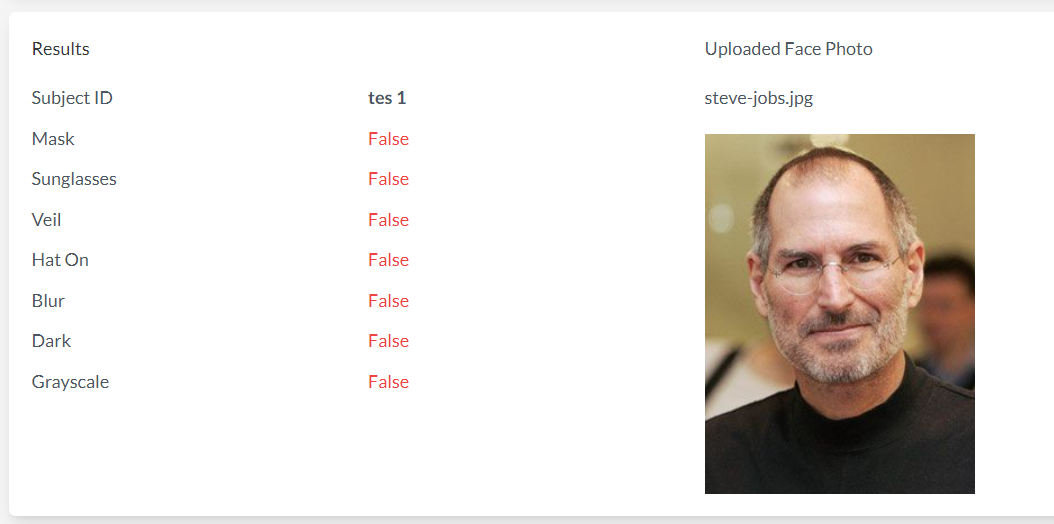
Demo Enroll Result
Verify
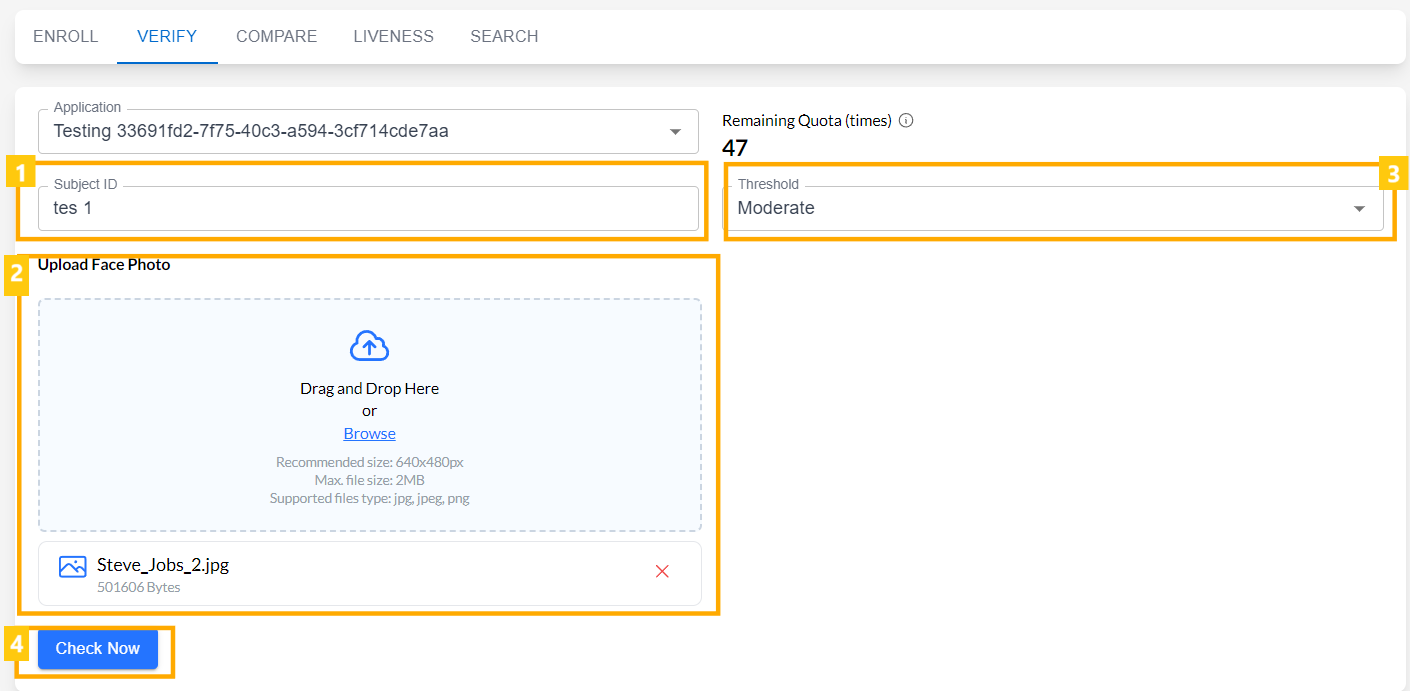
Demo Verify
Verify is used to verify the image you upload with the enrolled image through the Subject ID. This will determine whether the image uploaded in the Verify is the same as the image registered in your database. After choosing the application ID and make sure the quota is > 0, you can follow below instructions:
- Subject ID have to be filled with the Subject ID you fill from the Enroll Demo.
- Select the image you want to verify. You can drag the photo to the box, or browse from your documents.
- Choose the threshold level for the similarity between enroll & verify images. There are 3 levels: basic, moderate, and high.
- Click on "Check Now" and it will show the result of verification between the two images. If the value is true it means that the person from enroll & verify images are the same. But if the value is false it means that the person in those images are not the same.
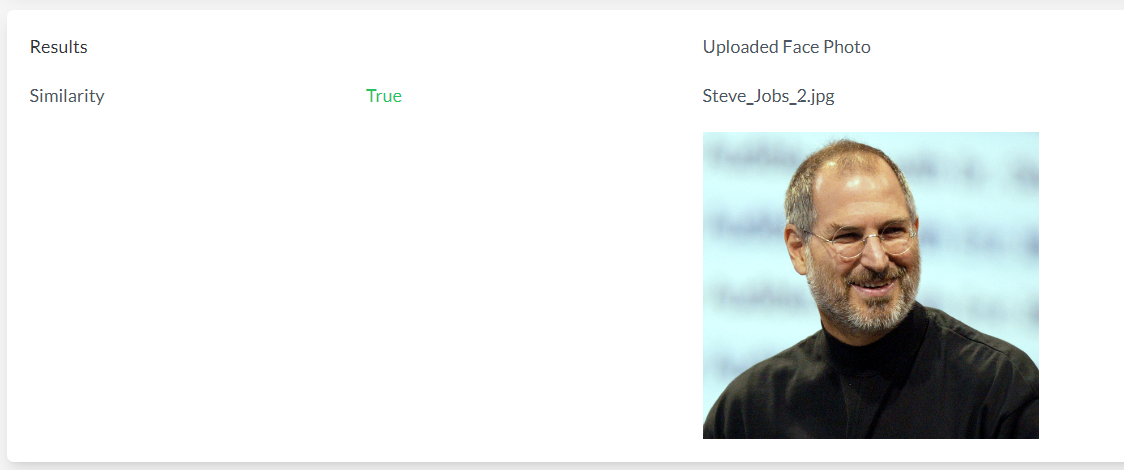
Demo Verify Result
Compare
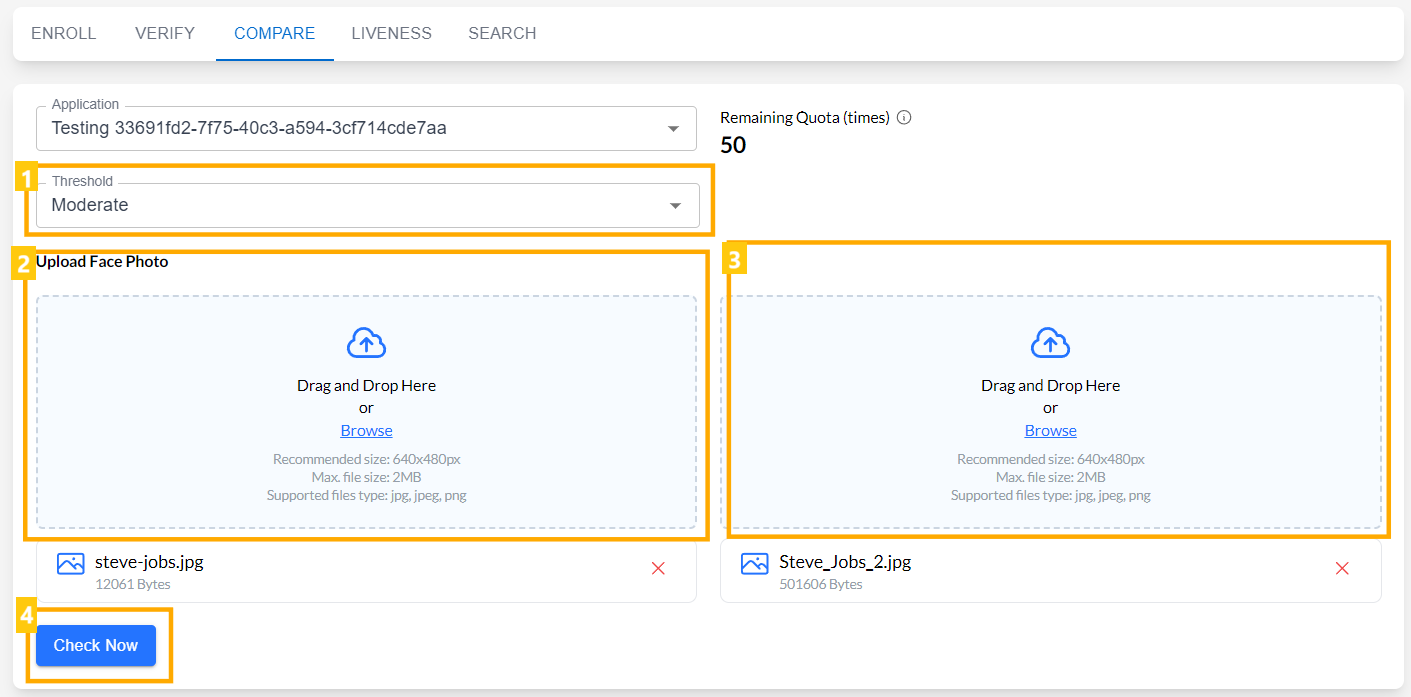
Demo Compare
Compare is used to compare two images face. It is similar with Verify but not using Subject ID. It compare 2 uploaded images instead. After choosing the application ID and make sure the quota is > 0, you can follow below instructions:
- Choose the threshold level for the similarity between 2 images. There are 3 levels: basic, moderate, and high.
- Select an image for the 1st Image that you want to be the reference.
- Select an image for the 2nd Image that you want to compare with the 1st Image.
- Click on "Check Now" and it will show the face similarity between the two images. If the value is true it means that the person in the uploaded images are the same. But if the value is false it means that the person in those images are not the same.
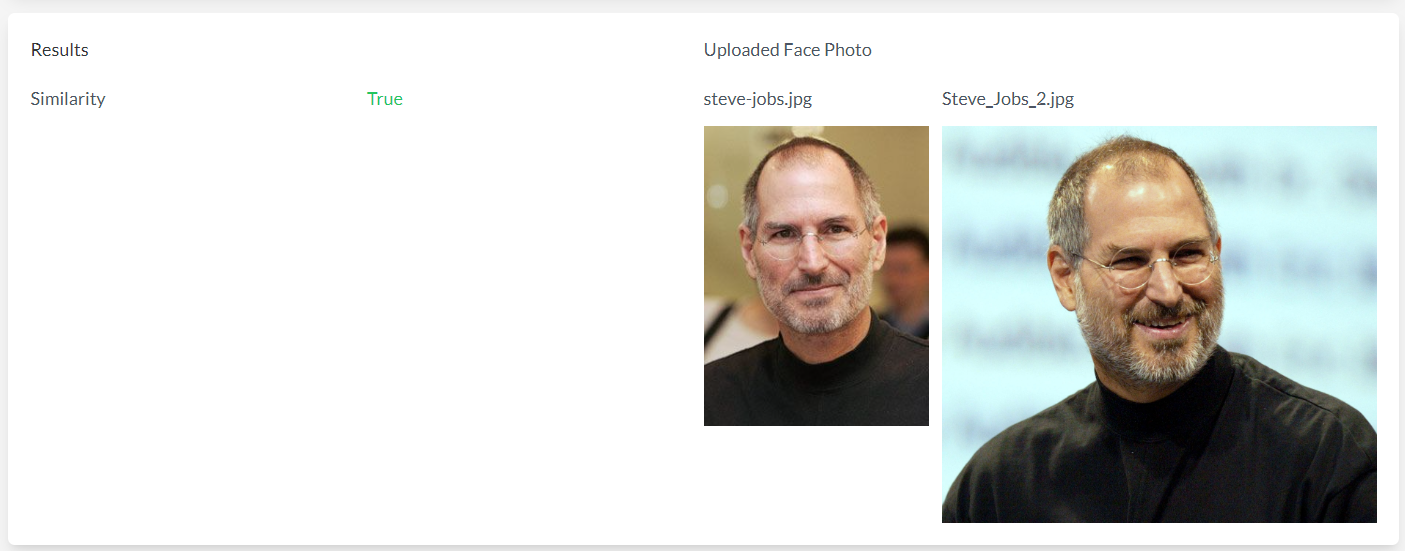
Demo Compare Result
Liveness
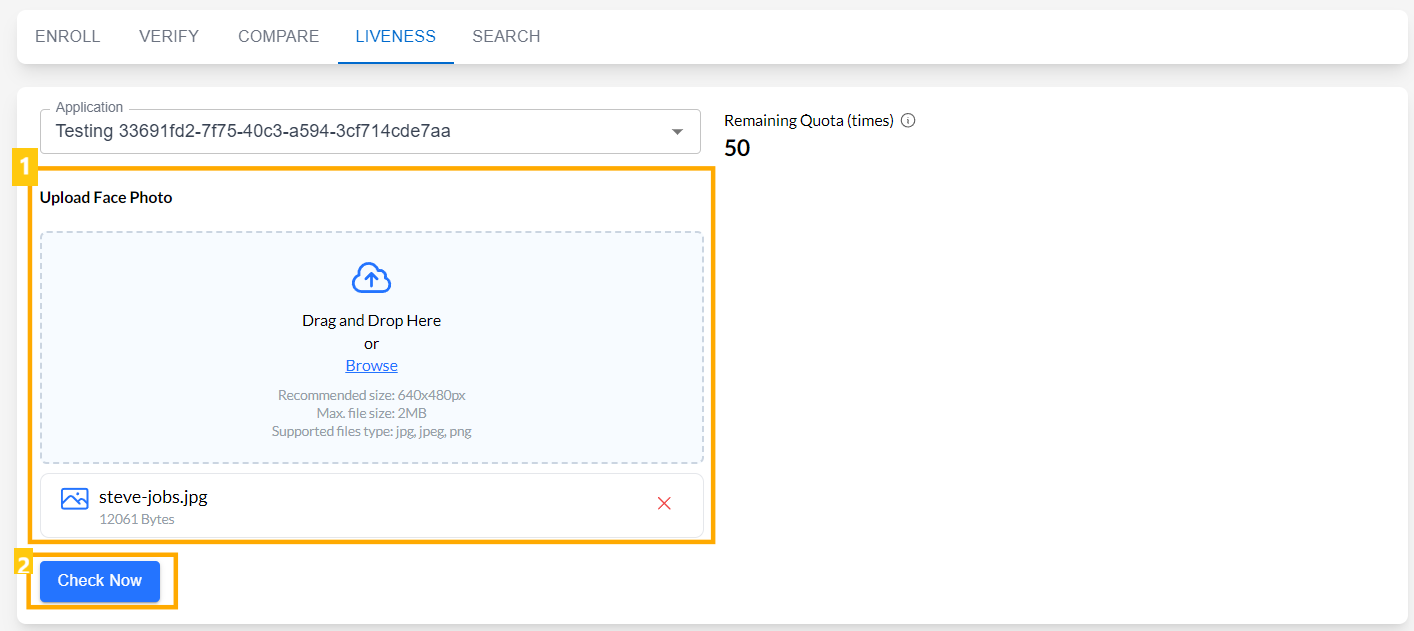
Liveness is used to detect whether the image uploaded is a spoof or a real person. After choosing the application ID and make sure the quota is > 0, you can follow below instructions:
- Select an image that want to be liveness tested by dragging or browse from your document.
- Click on "Check Now" button to check the liveness of the photo selected. If the value is true it means that the face on the photo is a real person. But if the value is false it means that it is a spoof.
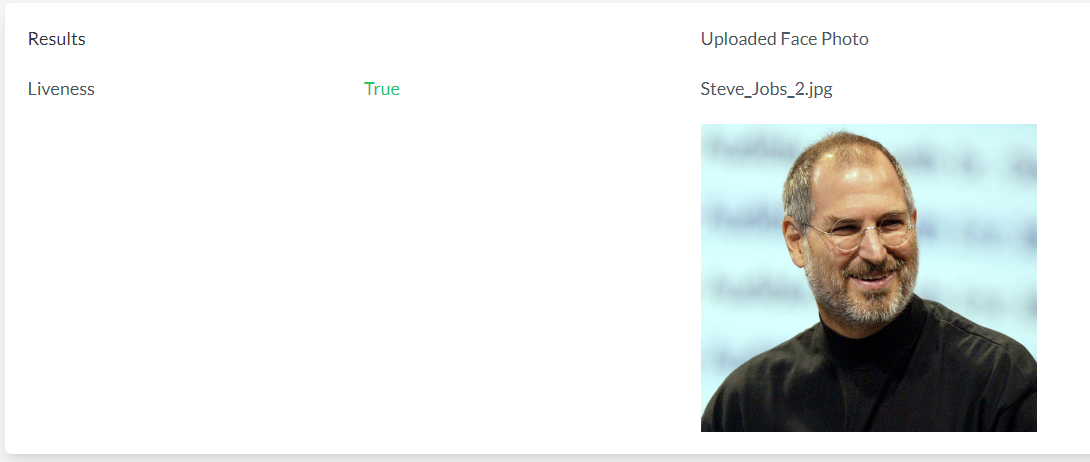
Demo Liveness Result
Search
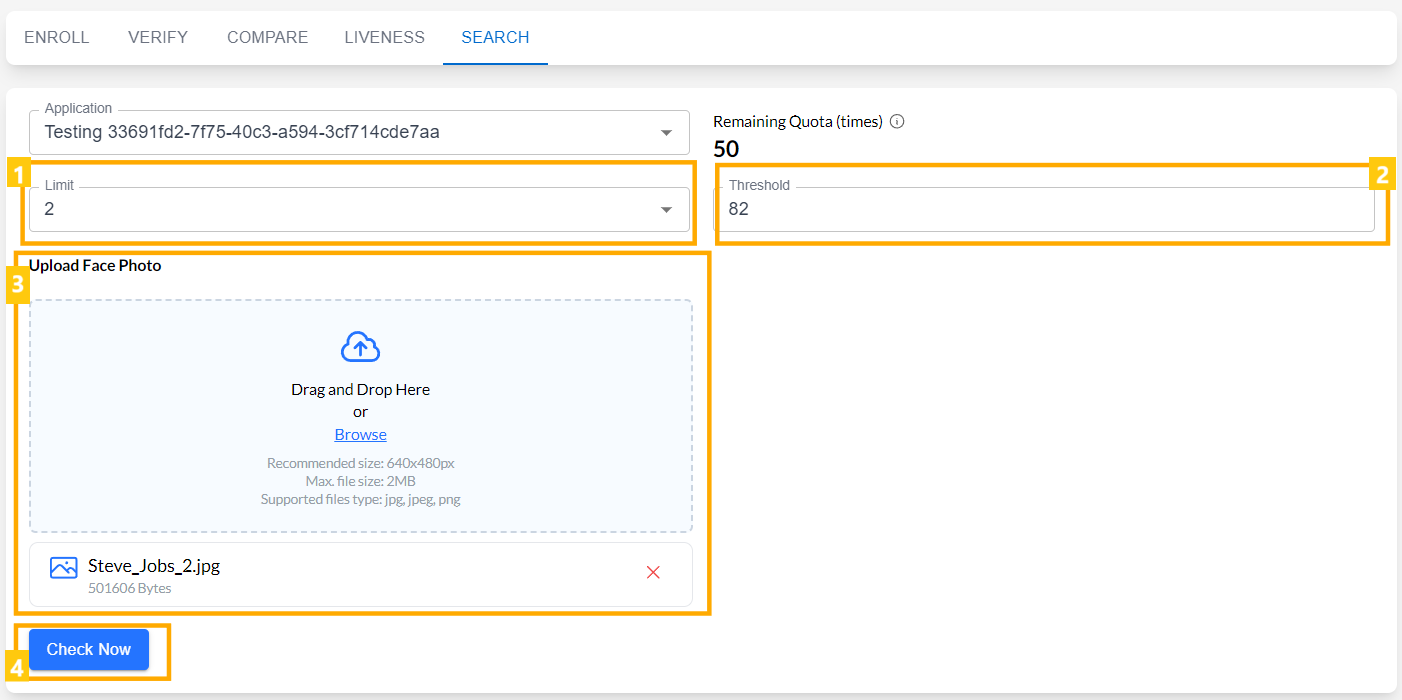
Demo Search
Search is used to search uploaded image to the images that have been enrolled. After choosing the application ID and make sure the quota is > 0, you can follow below instructions:
- Set number of result, minimum value is 1, and maximum value is 10. If the number of matched photo of the person that want to be searched in the database less then the limit value, the result will show all the similar photos. On the other hand, If the number of matched photo of the person that want to be searched in the database less then the limit value, the result will show the most simmilar photos with amount of the limit value.
- Set the minimum threshold for the criteria of the searched images. We recommend you to fill 82.
- Select an image that want to be searched by dragging or browse from your document.
- Click on "Check Now" button to search in enrolled images with the similarity within the set threshold. The result will show all the enrolled photos that similar with the one that user uploaded in search demo, with the similarity score and subject id.
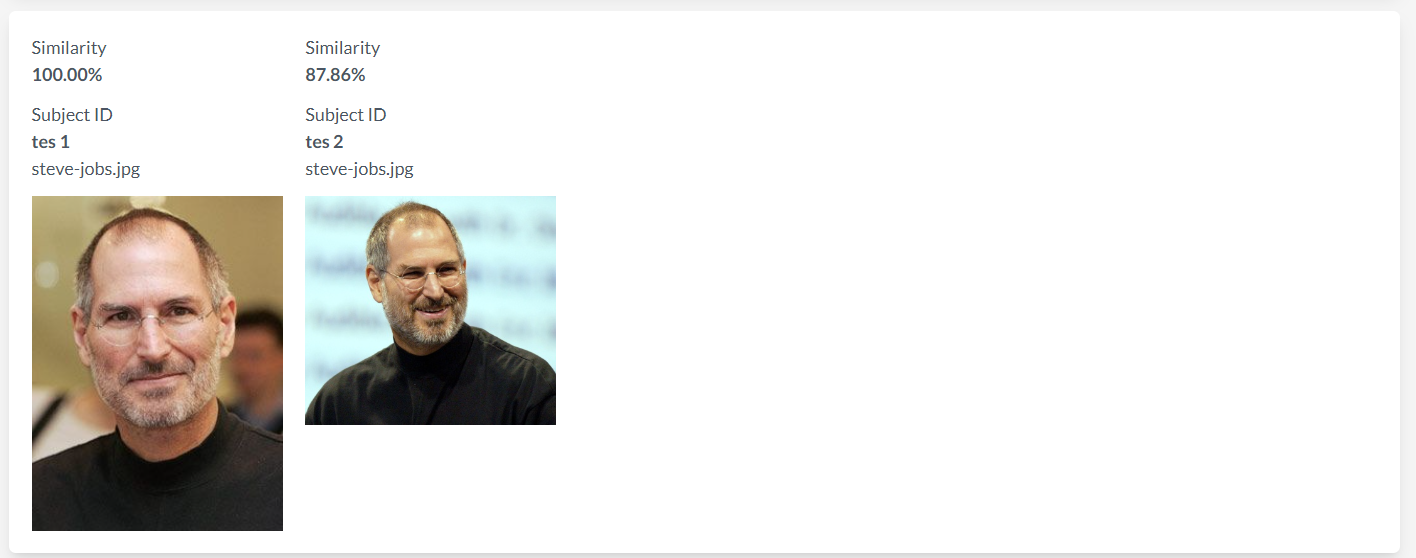
Demo Search Result
🎈SUMMARY
After clicking 'Face Recognition', click on Summary on the sidebar menu, you can check Summary of Face Recognition transactions. In SUMMARY you can see the total transaction of each face services which pass the entered threshold value. There is also filter button to distinguish the transaction by date, service mode and application id.
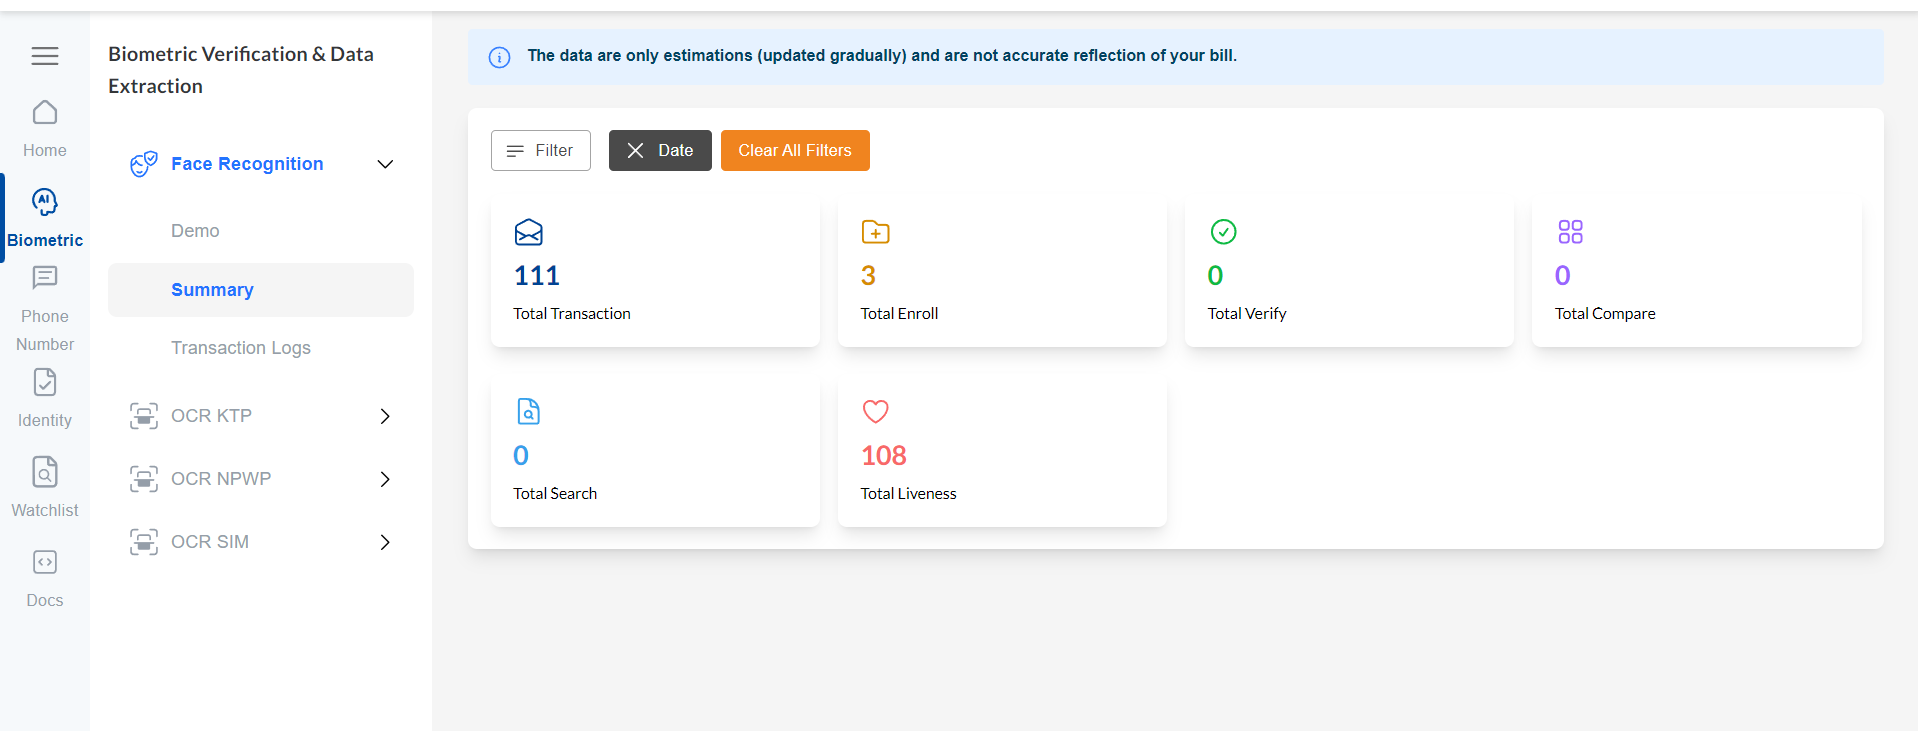
Summary details for Face Recognition
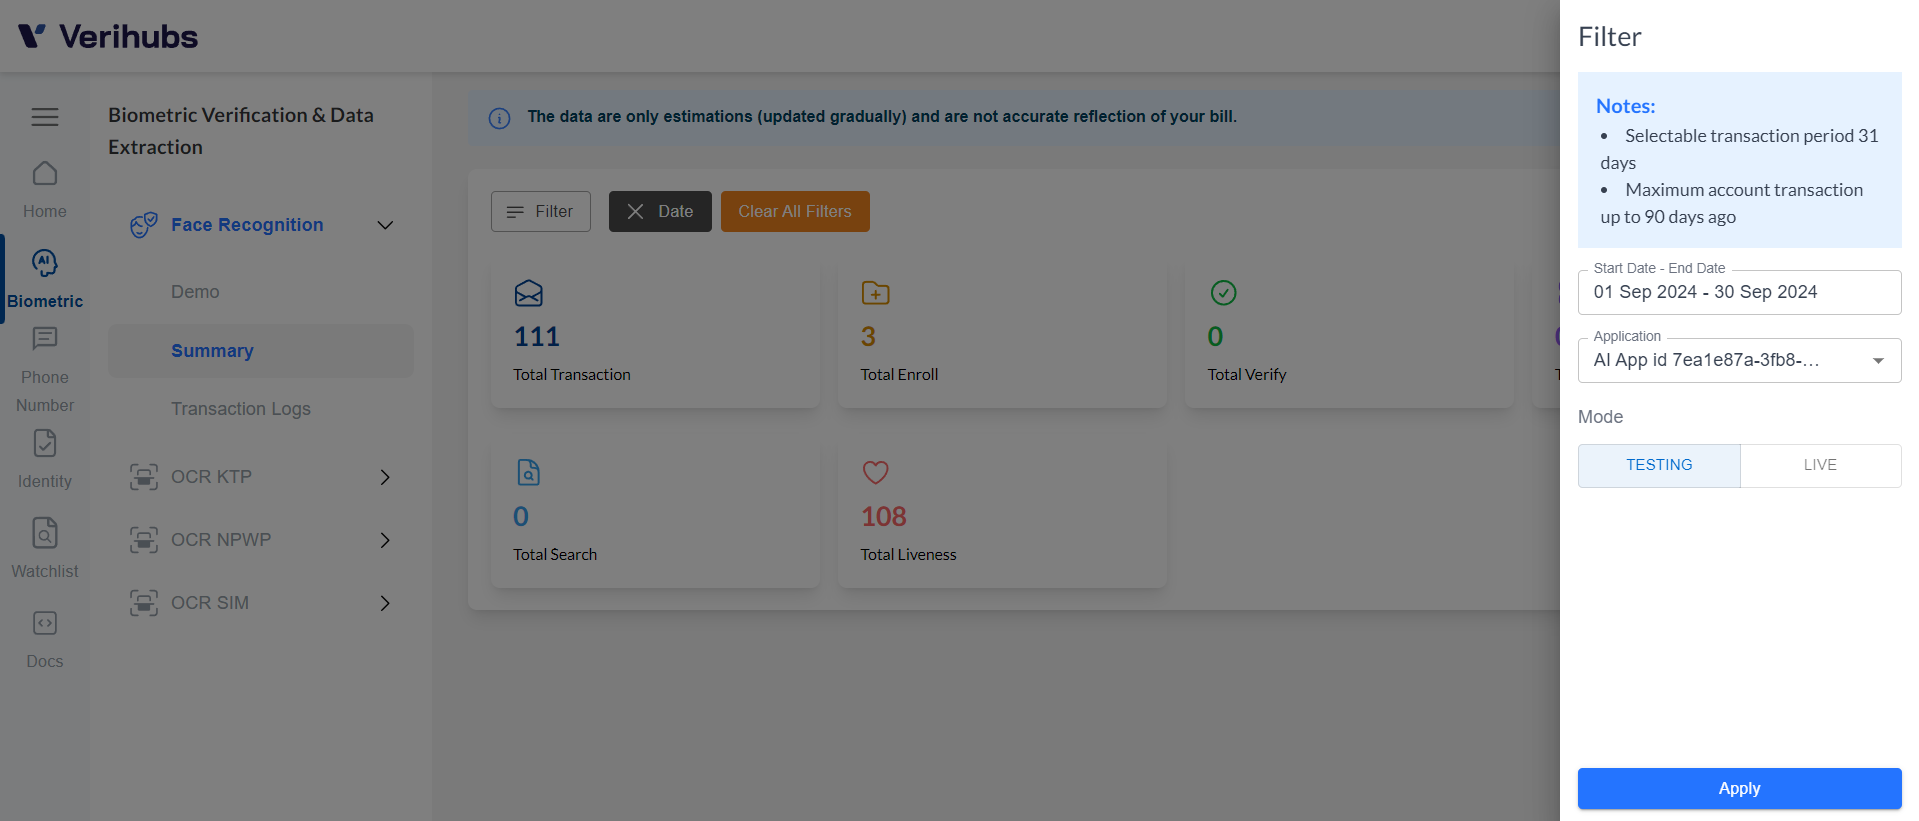
Summary Filter
🎈TRANSACTION LOGS
After clicking 'Face Recognition', click on Transaction Logs on the sidebar menu, you can check log details of Face Recognition transactions. TRANSACTION LOGS shows detail of your transaction in the table form, which consists of your application ID, application name, date, endpoint name, service charged and transaction status. You can filter the data by date period (max selected date from 90 days ago), application name, endpoint name and service charged. Moreover, the transaction logs shown also can be downloaded in form of XLS or CSV.
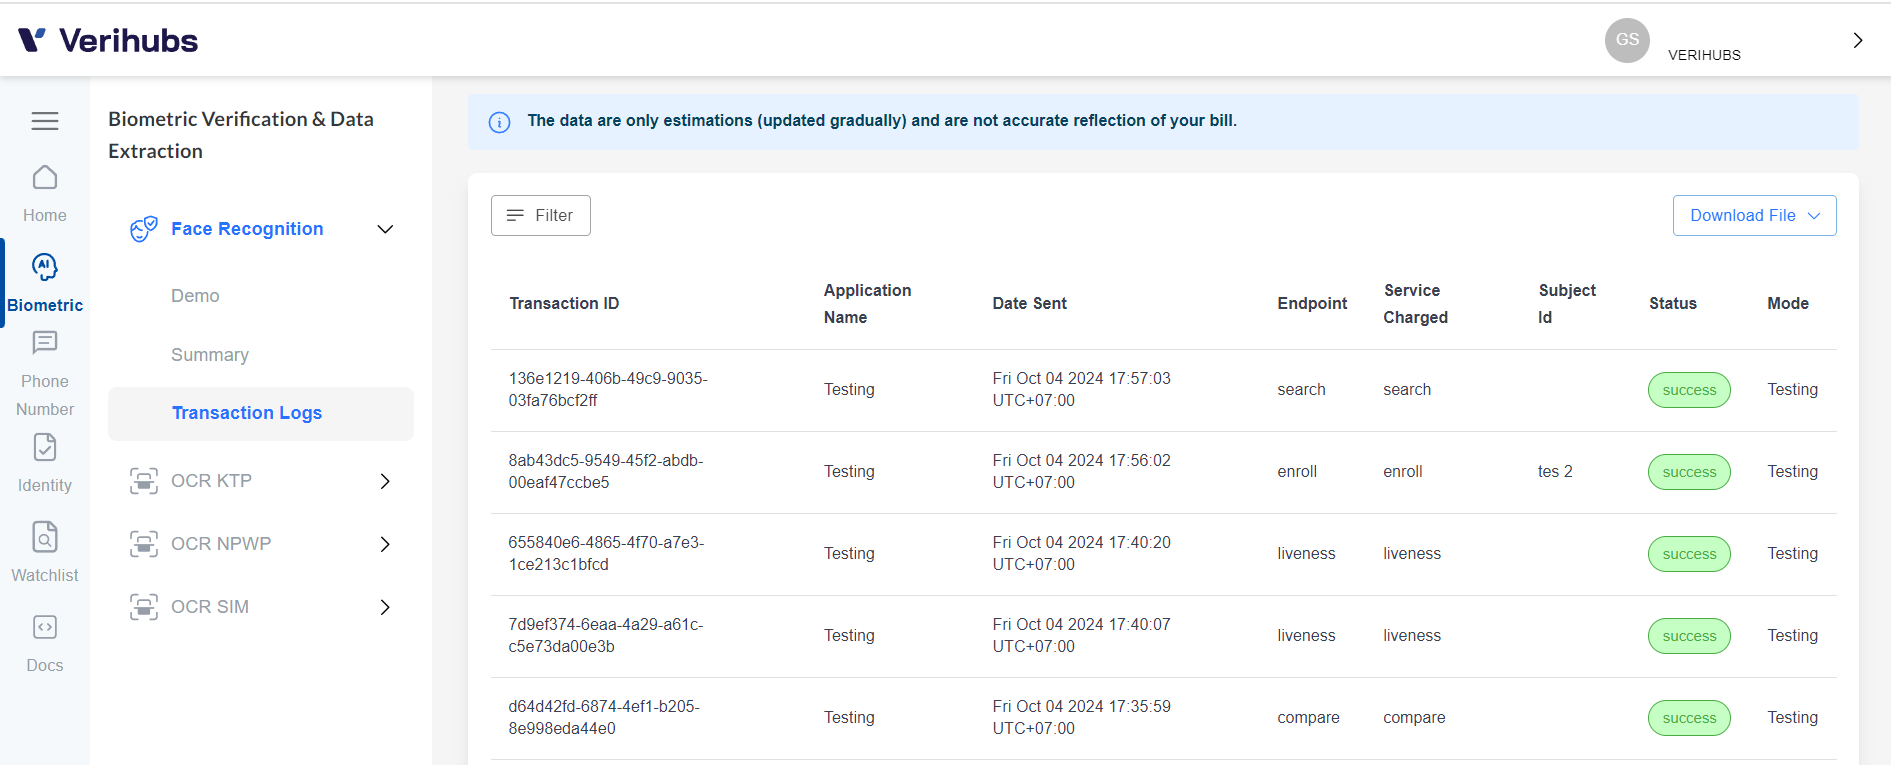
Transaction Logs
Updated 3 months ago
