Demo Page
Step by Step for Your First Sertel Transaction
Making a Request
Demo Page - Composing the Request
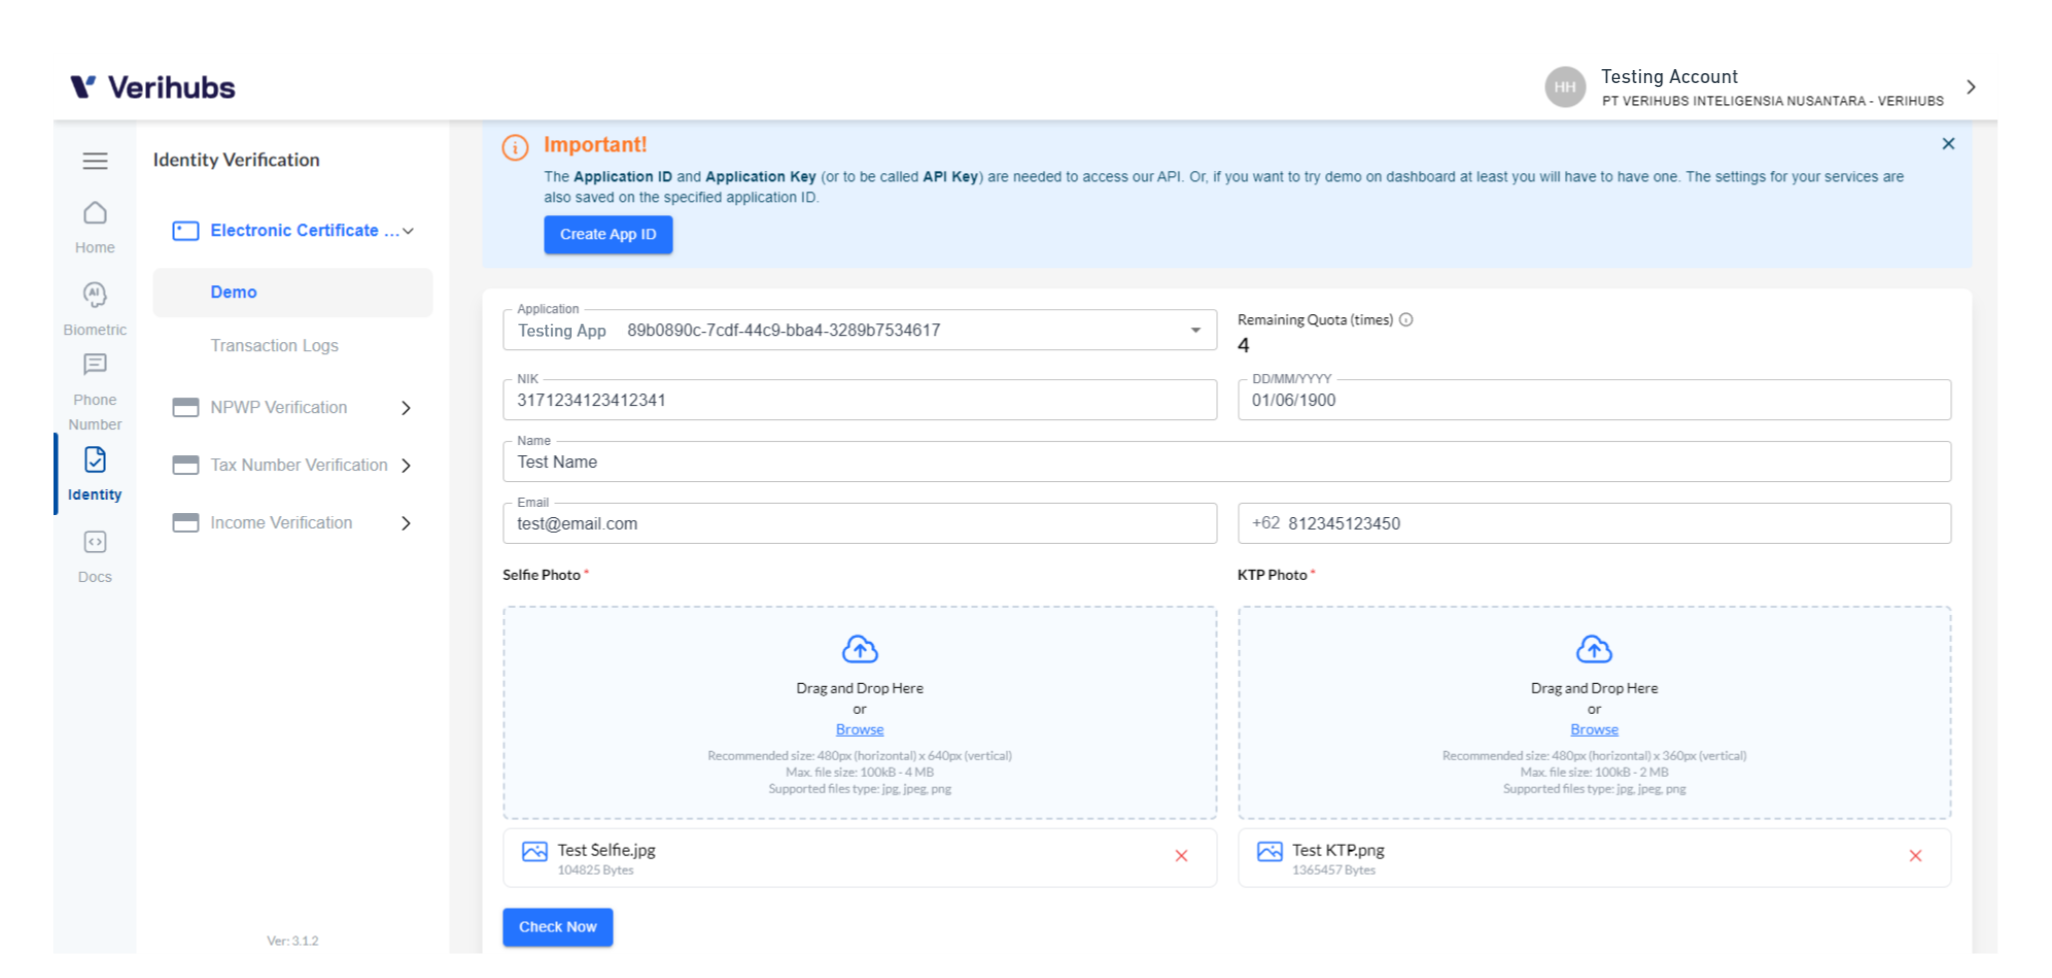
Access Verihubs Dashboarda, and click on Identity -> Electronic Certificate Issuance ->Demo on the sidebar menu and follow these steps:
- Select the Application ID. Make sure you have created one and it has been set by Verihubs.
- Check your remaining quota. You can only perform the transaction if you have remaining quota.
- Input NIK as stated on KTP.
- Select the Date of Birth as stated on the KTP.
- Input the full name as listed on KTP (string).
- Allowed strings: Alphabet -z][A-Z], , dot (.), comma (,), single quote ('), slash (/), dash (-).
- Minimum length: 2 character alphabet
- Input the email.
- Must be in email format.
- Must be unique per NIK.
- Input the phone number.
- Must be unique for each NIK.
- A valid phone number.
- Select the prefix country code.
- Upload or drag & drop the selfie photo.
- Size 100KB - 4MB.
- Pixelation min 480px (horizontal) x 640px (vertical), max 10.000 x 10.000 px.
- Allowed file types are jpg., jpeg., and png.
- Upload or drag & drop the KTP photo.
- Size 100KB - 2MB.
- Pixelation 480px (horizontal) x 360px (vertical).
- Allowed file types are jpg., jpeg., and png.
- Click on the
Check Nowbutton to check the data.
Response
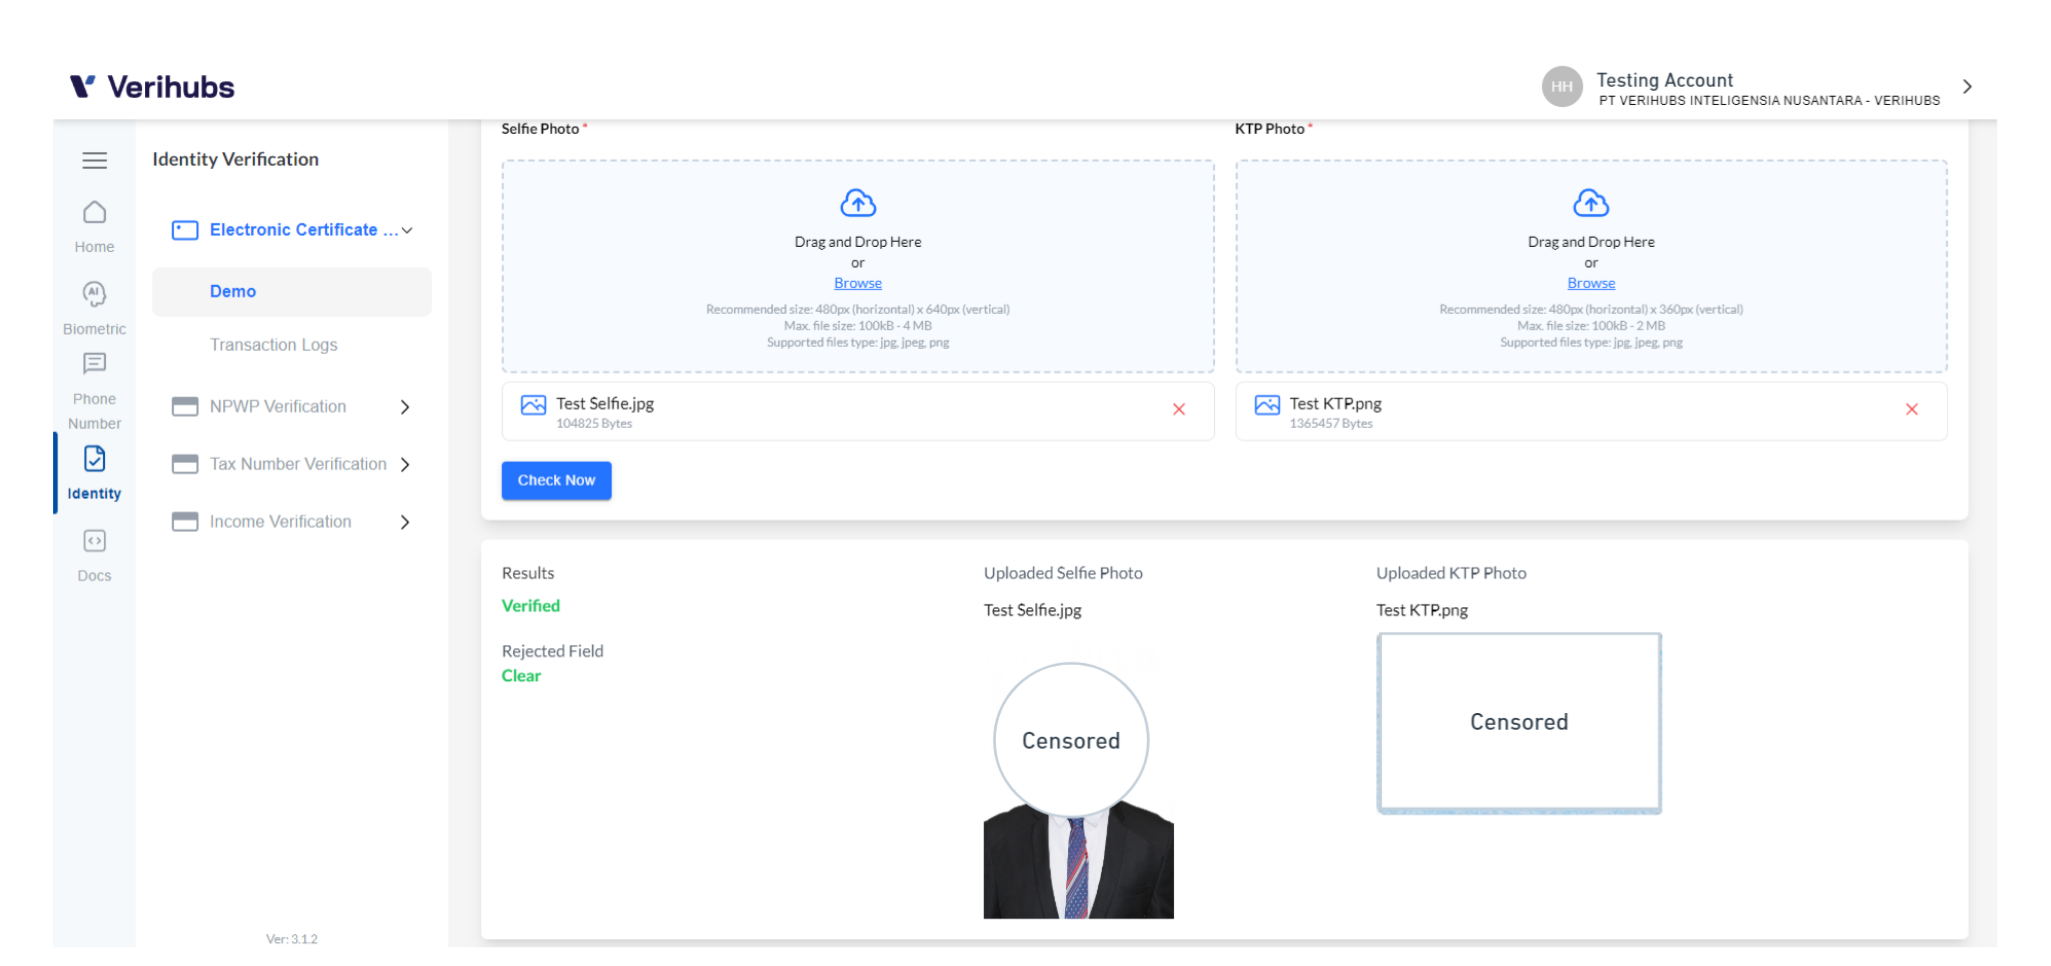
Demo Page - Response
You will receive a response that consist of:
Parameter | Expected Value | Description | Notes |
|---|---|---|---|
Results |
| Status of the identity checked. |
|
Reject Field |
| Aspect of the identity that does not match with the data exist on Authoritative Partner. | The reject field can be singular or combination of the list. |