
Bulk Verification
Bulk Verification is the Client Dashboard page used to submit ID Verification requests for many individuals at once, instead of submitting them one by one.
Page: ID Verification Bulk
Where to find it: open the Client Dashboard, then go to Identity Verification, then ID Verification, then Bulk Verification.
What you can do here
- Upload and submit multiple ID Verification requests in a single batch.
- Track the processing status of every submission in the batch.
Flow
Step 1: Initial view of the Bulk Send page
When you open Identity Verification, then ID Verification, then Bulk Send from the menu, this is what you see first.
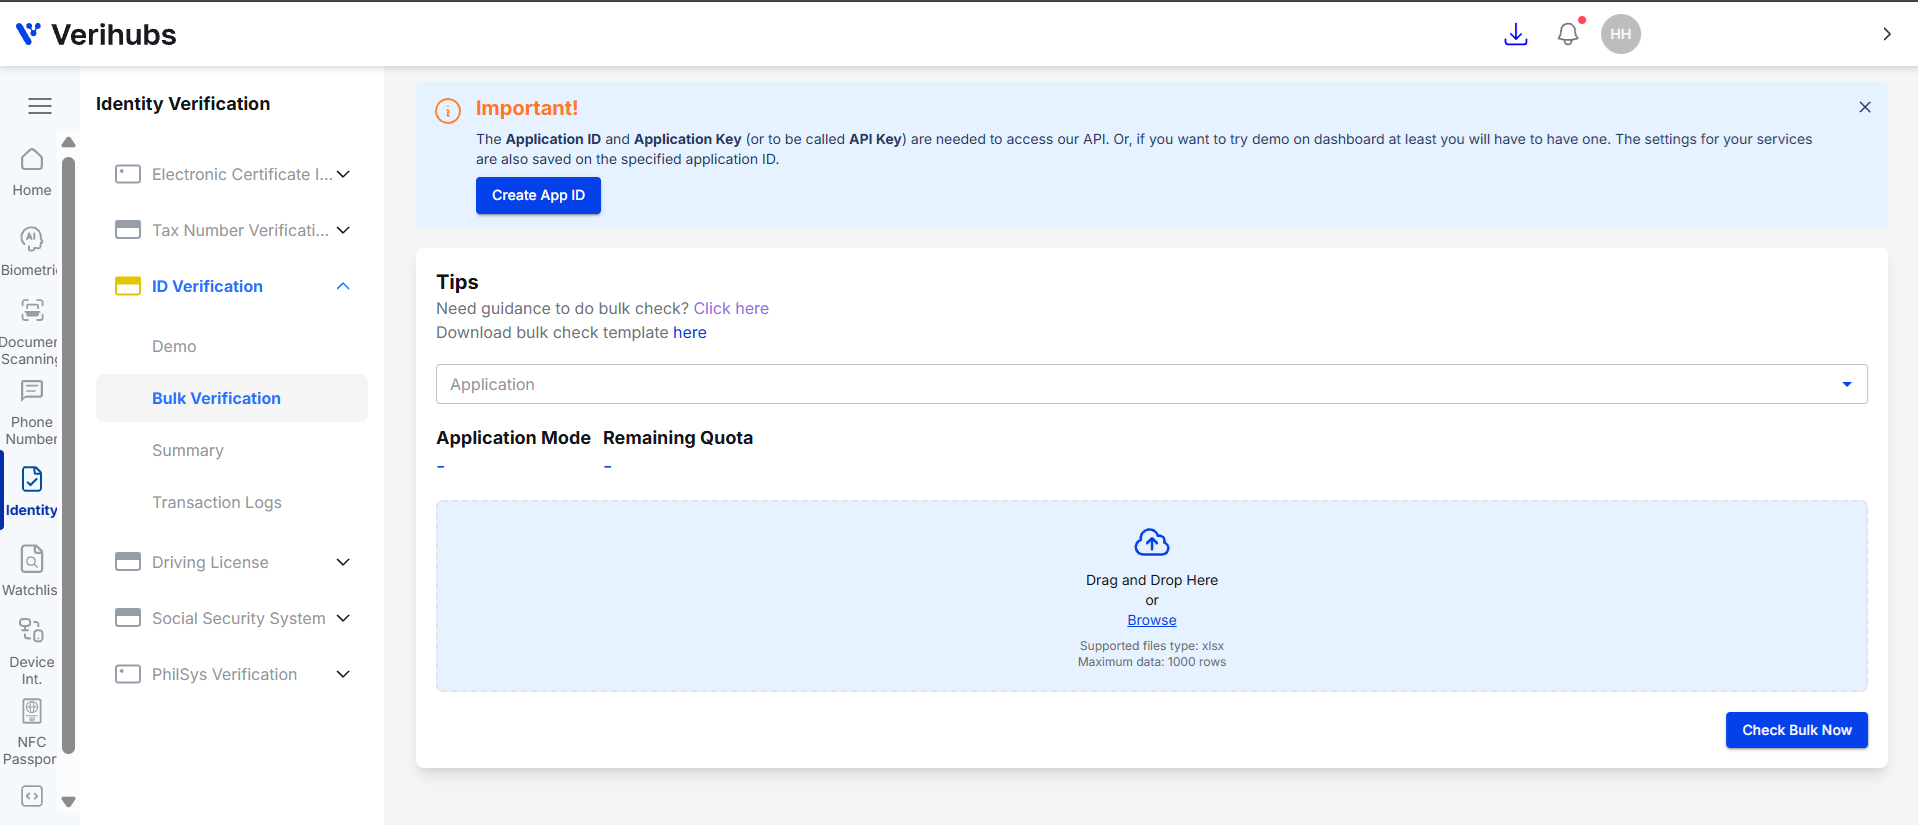
What is on this screen:
- Application: select the application that the bulk check will be recorded and billed under. Application Mode and Remaining Quota of that application are displayed right below the dropdown. Both show
-until an application is selected. - Drag and Drop Here / Browse: upload your batch file here. The supported file type is xlsx, with a maximum of 1000 rows per file.
- Check Bulk Now: submit the uploaded batch for processing.
- Tips: this section has two links.
- Click Here, the link that says "Need guidance to do bulk check?", opens the public guideline page Bulk Checking.
- here, the link that says "Download bulk check template here", immediately downloads the XLSX template for Bulk Checking. Always fill in this template instead of building your own file, so the columns match what the dashboard expects.
- Important! banner: the Application ID and Application Key (also called API Key) belong to the selected application and are required to access the API or to run a demo. If you do not have one yet, use Create App ID.
Step 2: Fill in the bulk check template
Download the XLSX template from the Tips section of the page, fill in one row per individual, then upload the file back to Bulk Send.
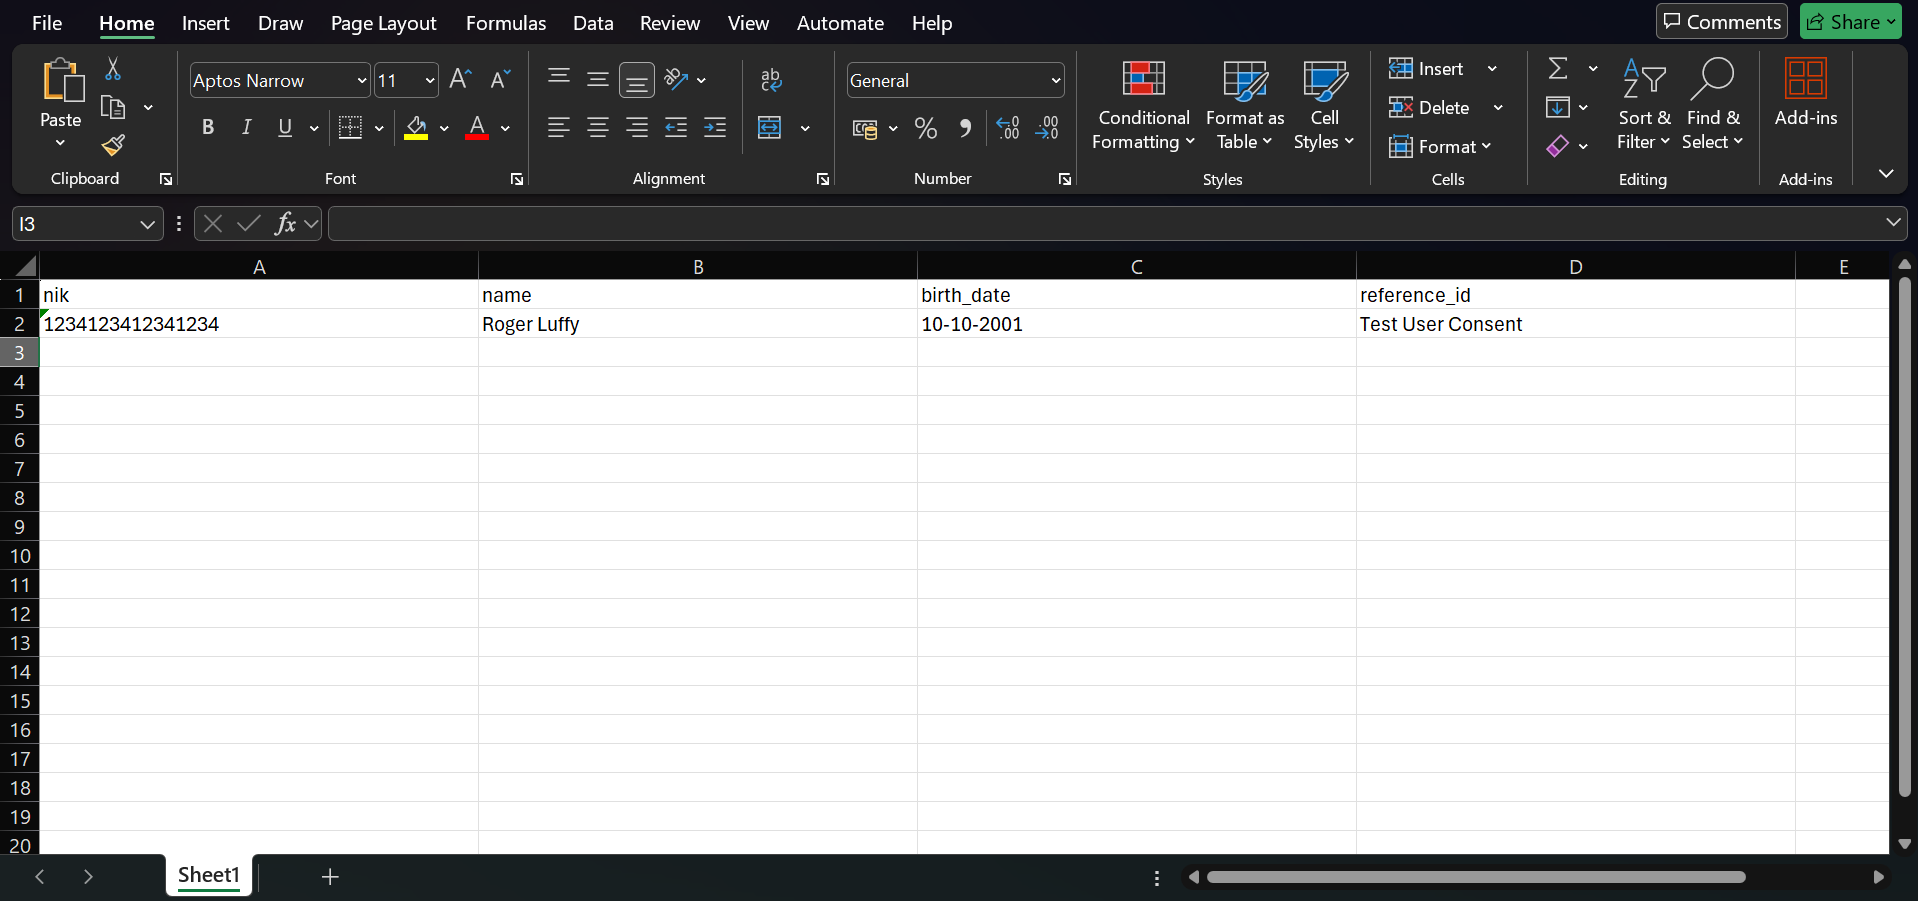
Rules for filling the template:
- Columns:
nik,name,birth_dateandreference_id. Keep the header row exactly as it is in the template. - nik: must be 16 digits. Set the cell format to text before entering it, otherwise Excel turns the NIK into scientific notation (
1.23412E+15) and the digits are lost. - name: written exactly as it appears on the individual's KTP.
- birth_date: format DD-MM-YYYY (example:
10-10-2001). - reference_id: filled in according to the client's own needs, for example the client's internal customer or case ID. This is the value the client will use to match the result back to its own records.
- Keep everything in text format: NIK and birth date must stay as entered. Do not let the spreadsheet convert them into numbers or dates.
- Maximum 1000 rows per file.
Step 3: Select the App ID to run the bulk check under
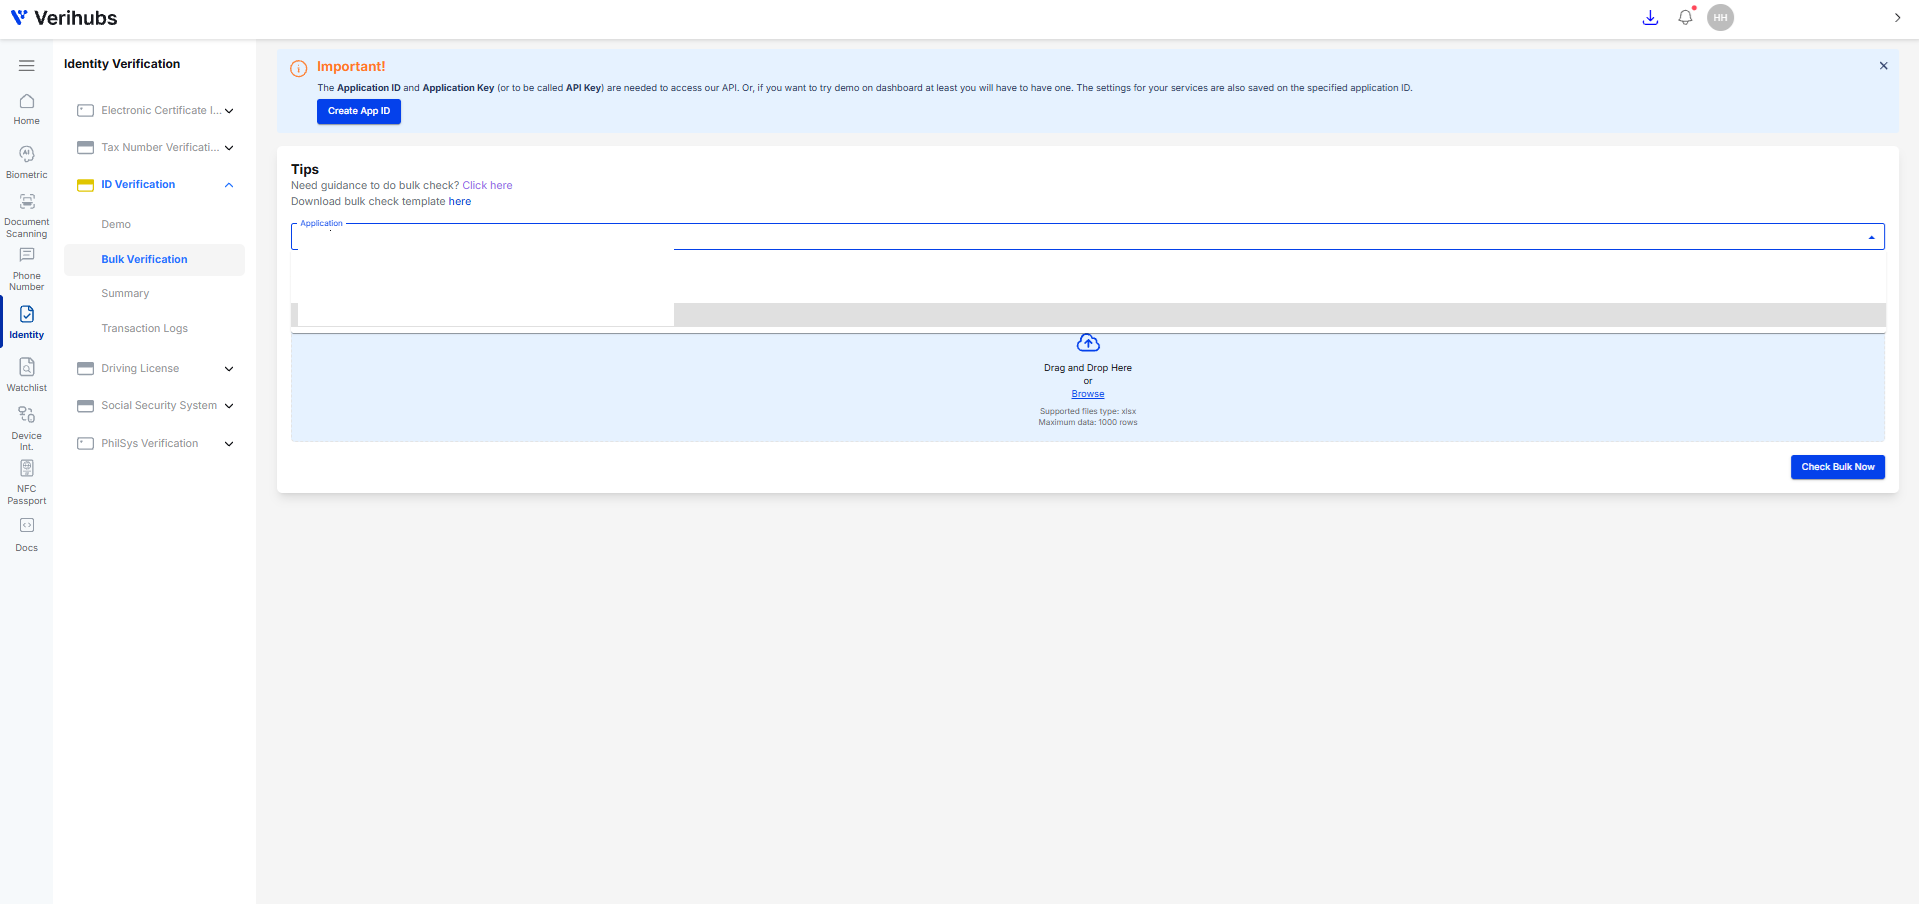
- Application: click the dropdown to see every App ID available to your account, then pick the one the bulk check should be recorded under. The transactions, the results and the quota are all tied to the selected App ID.
- Each row in the list shows the application name followed by its Application ID, the long ID string next to it.
- Both Test and Live mode App IDs can be used for a bulk check. Pick whichever fits the purpose, either a test run or a real production batch. The mode and remaining quota of the selected App ID are displayed right below the dropdown.
Step 4: Upload the batch file and submit
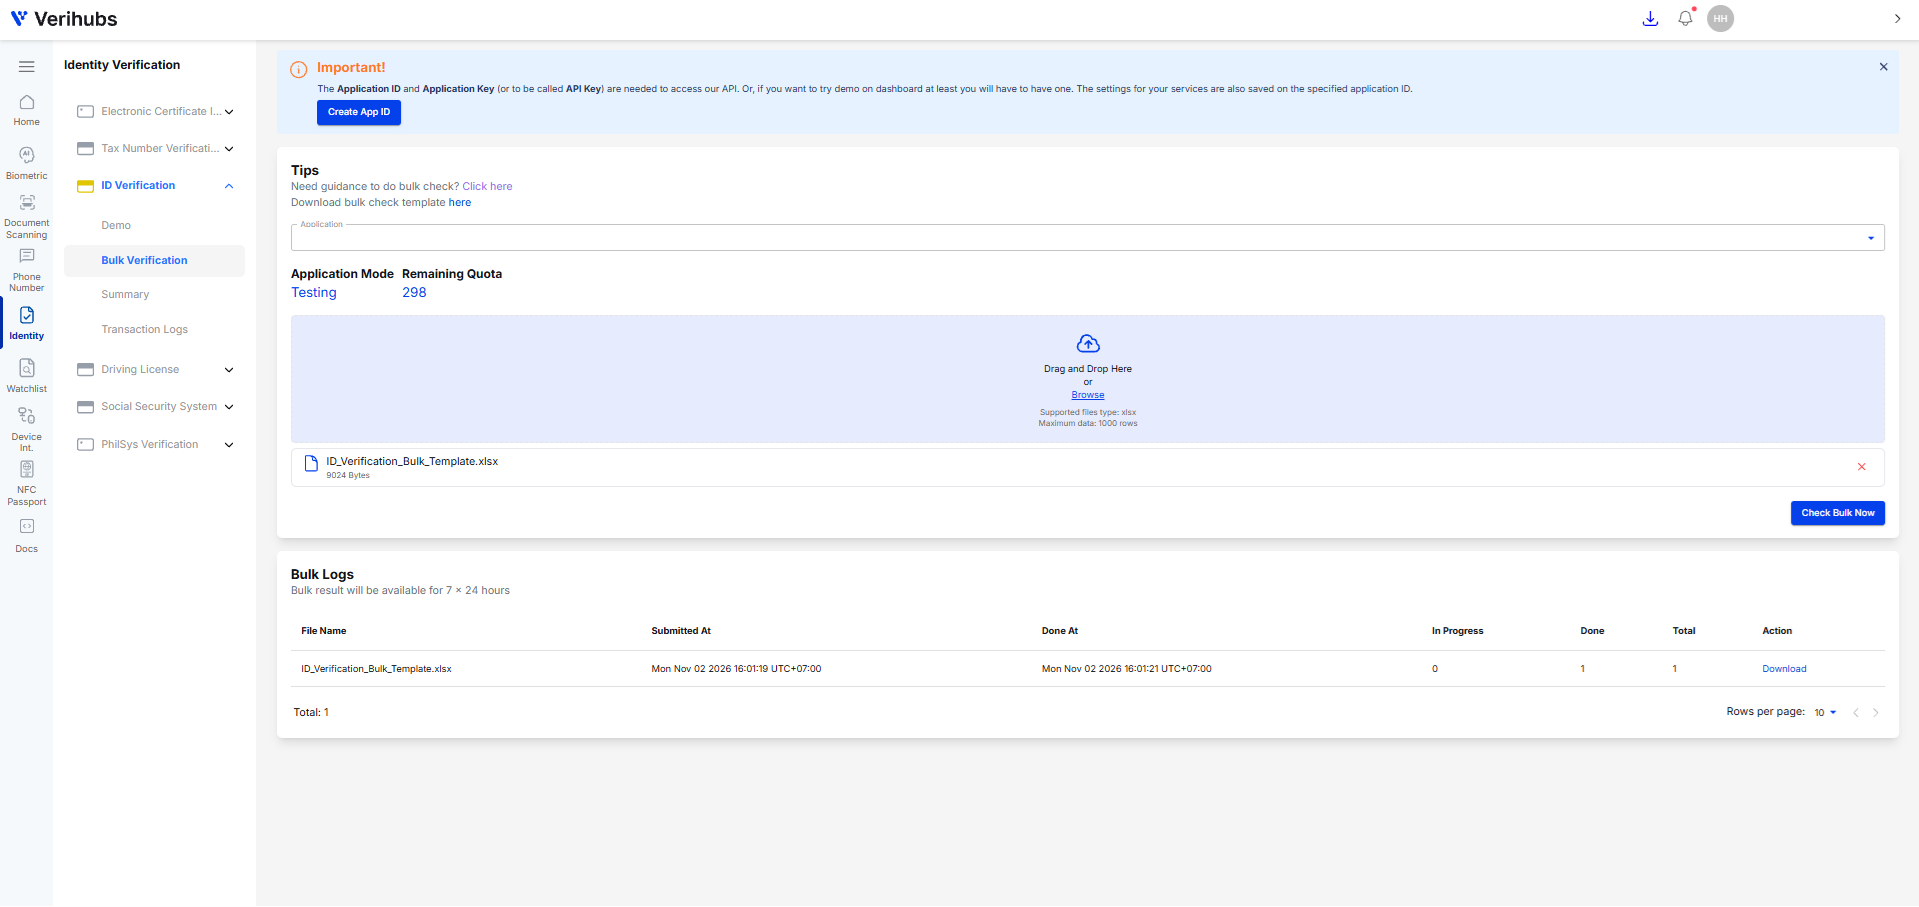
After an App ID is selected:
- Application Mode and Remaining Quota of the selected App ID are displayed right below the dropdown. In the example above the mode is
Testingwith299checks remaining. The quota shown is the quota of that specific App ID. - Drag and Drop the filled XLSX file onto the upload area, or click Browse to choose it from your computer. The supported file type is
xlsx, with a maximum of 1000 rows. - The uploaded file is listed below the drop area with its file name and size (example:
ID_Verification_Bulk_Template.xlsx,9023 Bytes). Use the ✕ close icon at the right end of the file row to remove it and upload a different file. - Click Check Bulk Now at the bottom right to submit the batch for processing.
Step 5: Agree to the User Consent
Click Check Bulk Now and a User Consent pop-up appears (Persetujuan pemrosesan data pribadi). Before the batch is submitted, the user must consent to Verihubs processing the personal data in the file.
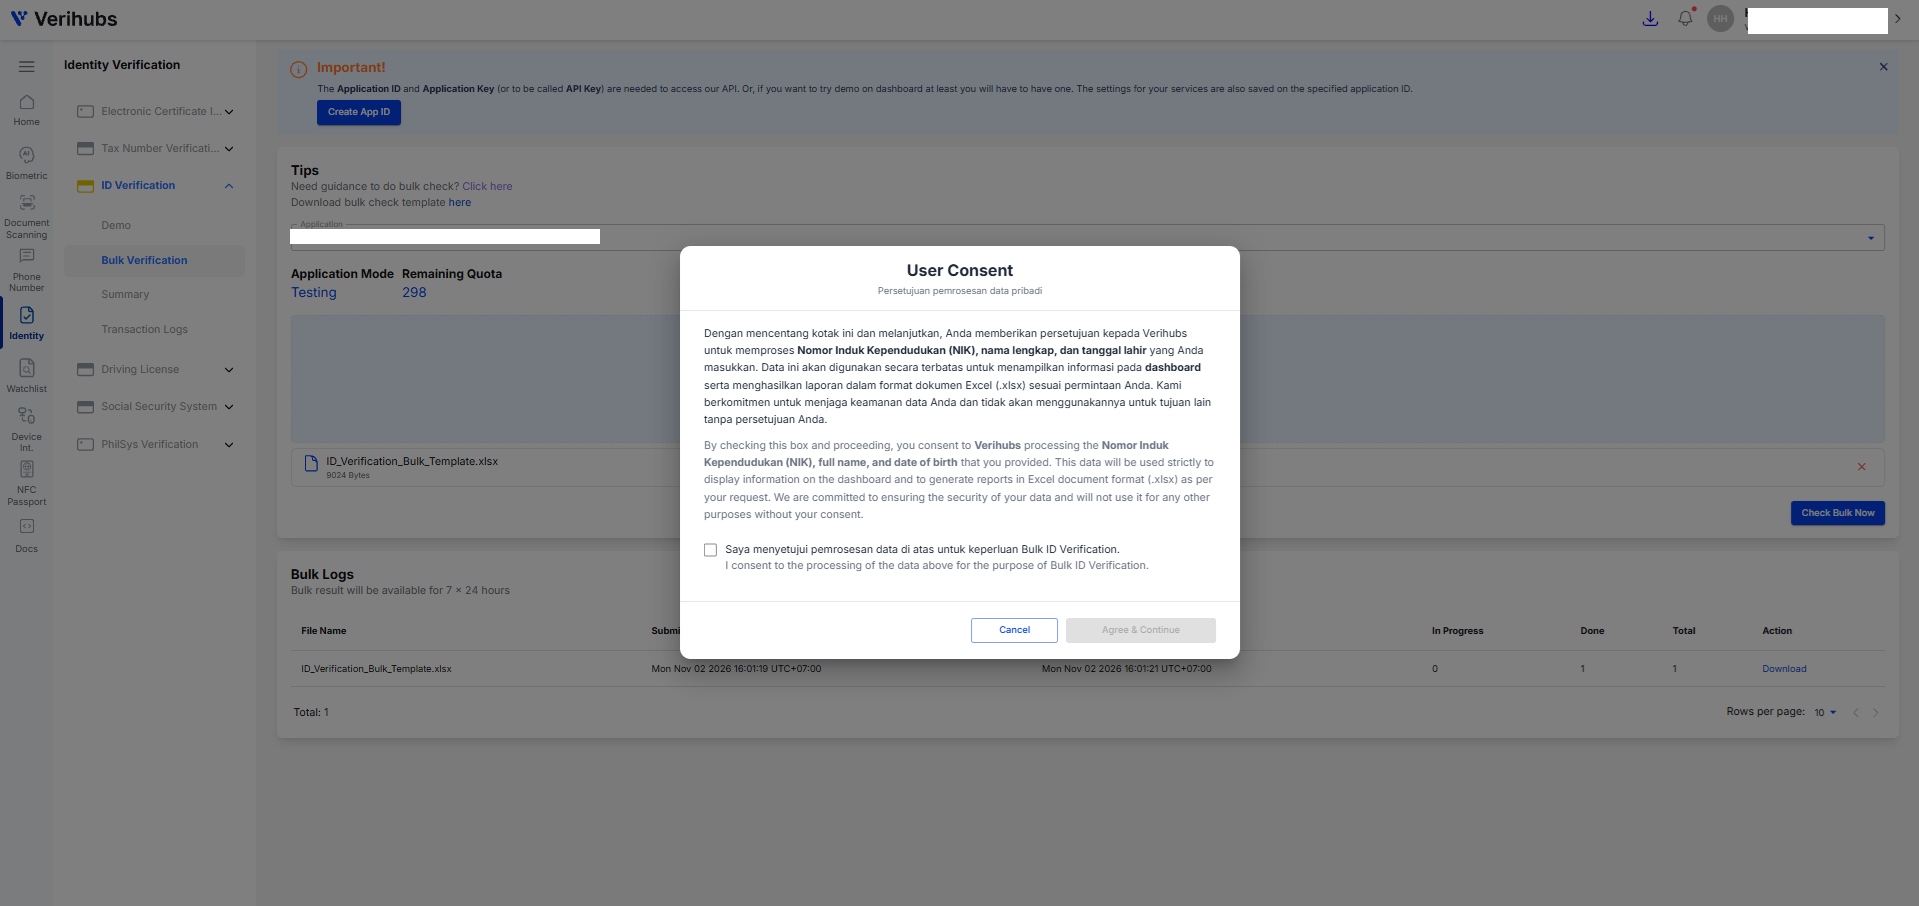
The statement explains that Verihubs processes the NIK, full name and date of birth entered in the file, uses that data only to display information on the dashboard and to generate the Excel (.xlsx) report at your request, and will not use it for any other purpose without your consent.
- Before the box is ticked, Agree & Continue is greyed out (disabled) and the process cannot continue.
- Tick the checkbox "Saya menyetujui pemrosesan data di atas untuk keperluan Bulk ID Verification" or "I consent to the processing of the data above for the purpose of Bulk ID Verification".
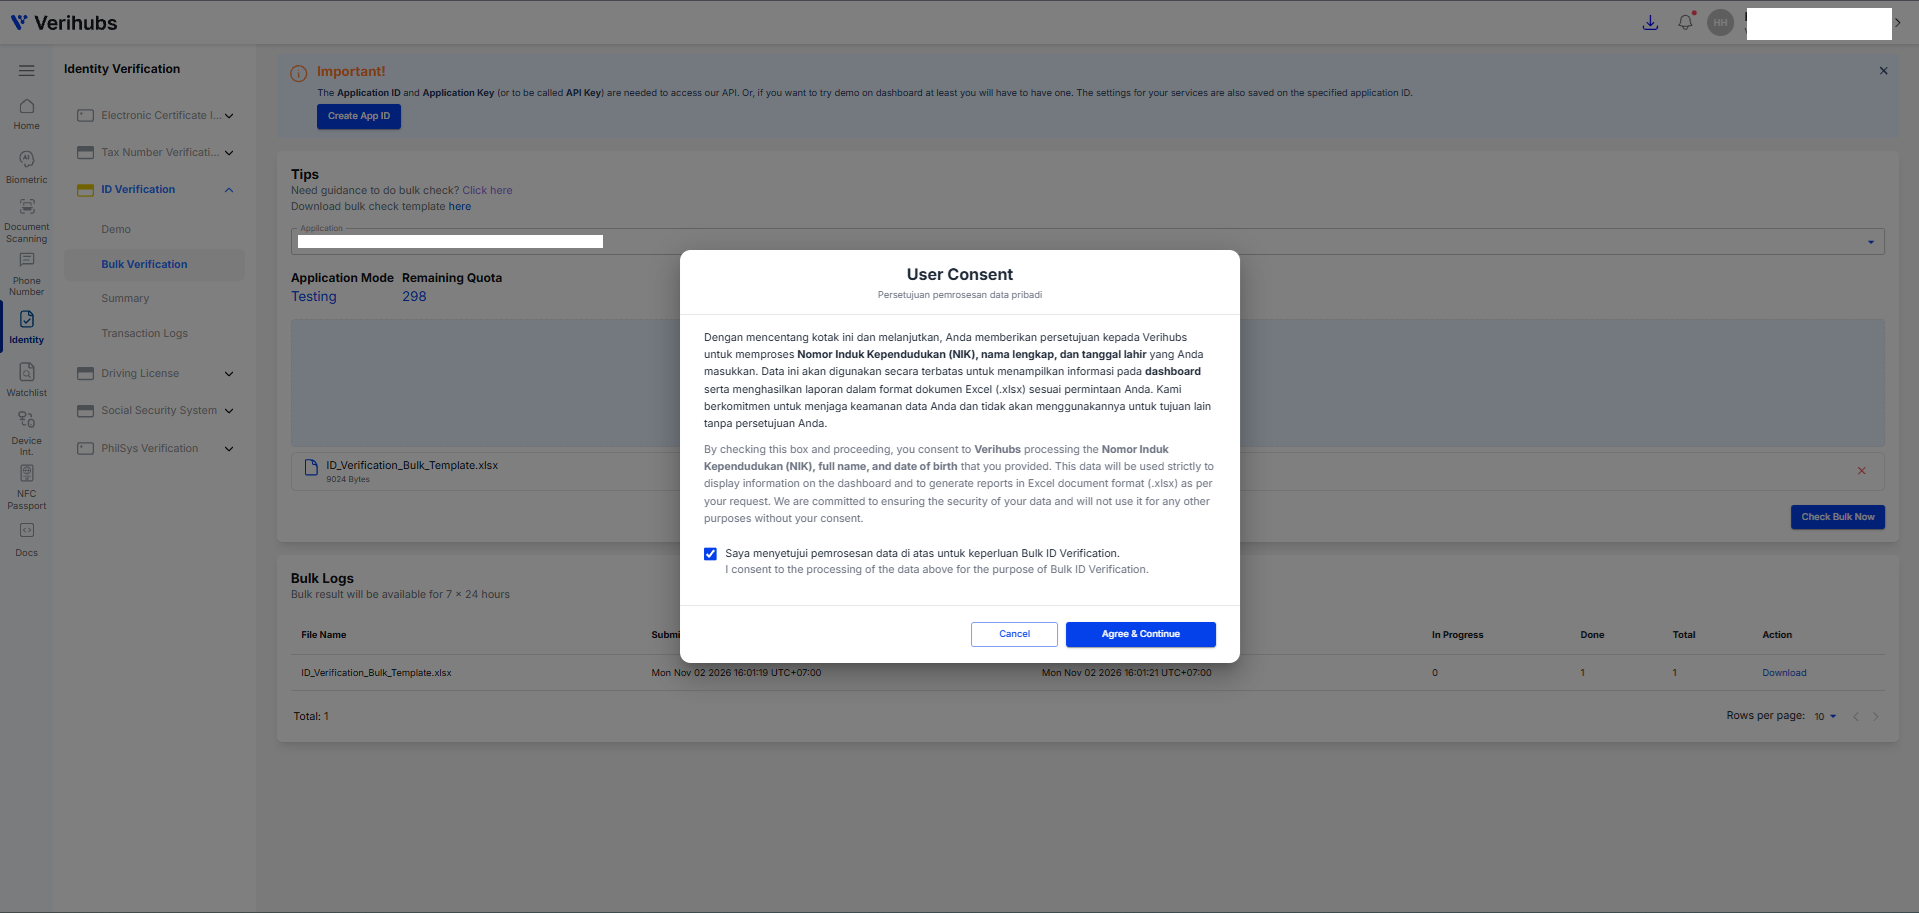
- Once the box is ticked, Agree & Continue becomes active (blue). Click it to continue with the bulk check.
- If the user does not agree, click Cancel. The pop-up closes and the batch is not submitted.
Step 6: Monitor the batch status in Bulk Logs
After the file is submitted, the batch is listed under Bulk Logs at the bottom of the page.

- Bulk Logs lists every batch file submitted from this page, with the newest submission on top.
- The page notes that "Bulk result will be available for 7 x 24 hours. Go to Export File page for the result." The result of a batch stays available for 7 x 24 hours, and the full report can also be taken from the Export File page.
- Columns:
| Column | Meaning |
|---|---|
| File Name | The XLSX file that was uploaded. |
| Submitted At | When the batch was submitted (page time, UTC+07:00). |
| Done At | When processing of the batch finished. |
| In Progress | Number of rows still queued plus currently being processed, that is, rows that are not finished yet. |
| Done | Number of rows that are already finished. |
| Total | Total number of data rows in the Excel file. |
| Action: Download | Download the verification result of that batch. |
- While a batch is still running,
In Progress > 0andDone < Total. Once it is finished, the row readsIn Progress = 0andDone = Total, as in the example above.
Updated 1 day ago